What Causes LED Lights to Fail and How to Fix Them

Time:2026-10-26 Author:Madeline
0%

LED lighting is often marketed as a long-life solution, but “long life” does not mean failure-proof. The U.S. Department of Energy reports that LEDs use at least 75% less energy and can last up to 25 times longer than incandescent lamps. Those figures describe well-designed products under suitable conditions. They do not guarantee reliable performance inside a hot ceiling, damp bathroom, or poorly ventilated fixture.

Understanding what causes led lights to fail requires examining the complete system, not only the diode. Heat is a common culprit. A blocked heat sink can raise internal temperatures and damage the LED driver, producing flicker, delayed start-up, or sudden darkness. Voltage spikes, loose wiring, moisture, and incompatible dimmer switches can create similar symptoms. A brown mark near the base often suggests overheating, while repeated flickering may point toward a failing driver rather than the LED chip itself.

Industry testing also deserves careful interpretation. IES LM-80 measures LED package lumen maintenance, while TM-21 projects that performance; neither test represents every complete fixture. ENERGY STAR and DOE guidance emphasize thermal management, electrical compatibility, and product quality. Technicians should check the fixture’s rated temperature, inspect connections, and test the driver before replacing an entire lamp. Sometimes the fixture is the problem. Sometimes installation is. That distinction is easy to miss, and even experienced installers can overlook it. This guide connects laboratory expectations with practical repair decisions, while acknowledging an uncomfortable truth: cheaper LED products may save money initially, yet fail earlier when their drivers, capacitors, or heat paths are poorly designed.
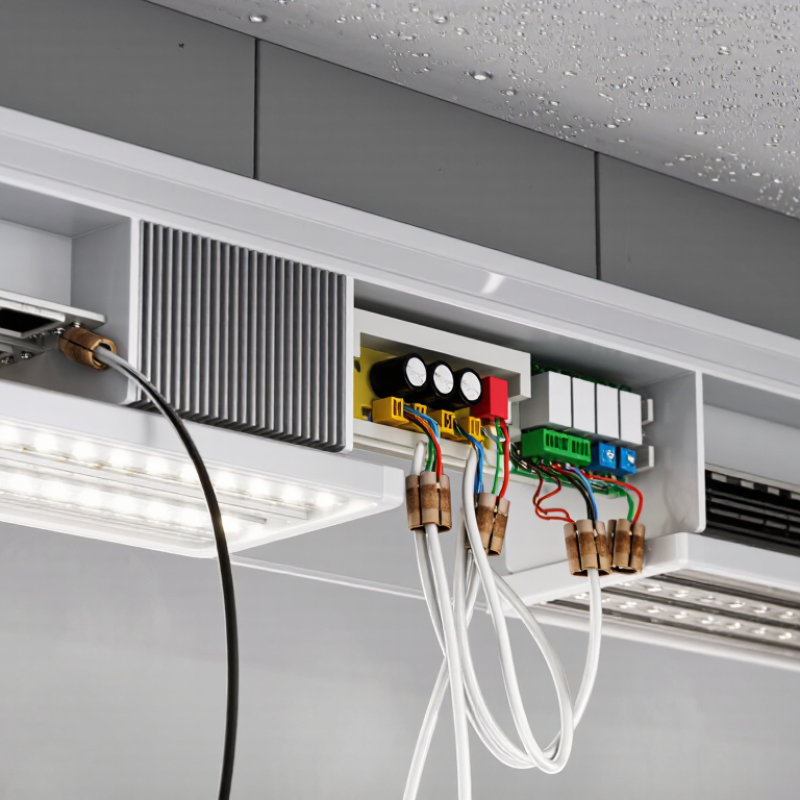
What Causes LED Lights to Fail and How to Fix Them

What LED Lights Are and How They Work

An LED, or light-emitting diode, produces light when electric current passes through a semiconductor. Electrons release energy as photons, creating visible light with little heat compared with older bulbs. The LED itself is only one part of the system. A driver changes household electricity into a controlled current that the diode can safely use.

Heat remains a common enemy. Poor ventilation, a dusty fixture, or an undersized heat sink can raise internal temperatures and weaken the diode. Voltage surges may damage the driver first. Flickering often points to a loose connection, incompatible dimmer, or failing power supply. In my repair experience, replacing the bulb alone sometimes hides the real problem. I should check the socket and circuit before calling it fixed. Turn off power, tighten safe connections, and clean blocked vents. Replace a damaged driver with a correctly rated unit, preferably through a qualified electrician.

Tips: Touch the fixture after it has run for an hour. Excessive heat deserves attention. Check for darkened LED chips, buzzing, or repeated flickering. Use the correct dimmer and keep moisture away from non-rated fixtures. Do not bypass electrical protections. Some failures are less obvious; a lamp may look normal while its driver slowly loses stability. Careful testing with suitable equipment is more reliable than guessing.

The Main Causes of LED Light Failure

LED Light Failure: The Main Causes

LED lights usually fail because of heat, unstable voltage, moisture, or poor electrical connections. Heat is especially damaging when fixtures sit above ceilings or inside sealed fittings. The LED may still glow, but its brightness slowly drops. A failing driver can cause flickering, delayed start-up, or sudden darkness. Loose wires and corroded terminals create resistance, producing heat at the connection point. In practical maintenance, the lamp is often blamed first. That is not always correct.

Tips: Switch off power before inspection. Check for loose terminals, darkened plastic, water marks, and blocked ventilation. If a multimeter is available, test the incoming voltage and driver output. Replace damaged parts with matching electrical ratings. Do not install a brighter lamp in a fitting that cannot release heat.

Some failures come from repeated power surges or unsuitable dimming systems. Moisture can enter through cracked seals, especially in bathrooms, garages, and outdoor fixtures. A lamp may work again after cooling, then fail hours later. That pattern points toward overheating or driver damage. I have seen quick replacements hide the real problem, which makes the repair temporary. A careful diagnosis takes longer, but it usually prevents another dark fixture. If wiring looks burned or voltage readings seem abnormal, use a qualified electrician.

What Causes LED Lights to Fail and How to Fix Them - The Main Causes of LED Light Failure

Common LED Light Failure Causes, Symptoms, and Practical Solutions
Failure Cause What Happens Common Symptoms Recommended Fix Prevention
Excessive heat High temperature accelerates LED lumen depreciation and can damage the driver or circuit board. Reduced brightness, discoloration, flickering, or shortened service life. Turn off the power, improve ventilation, remove dust, and replace the light if heat damage is visible. Use the correct fixture rating and avoid covering heat sinks or ventilation openings.
Driver failure The driver converts incoming power to the regulated current required by the LEDs. Its electronic components can fail independently of the LEDs. The light is completely off, flashes repeatedly, or turns off after warming up. Check the power supply and connections; replace the driver or the complete fixture when the driver is not serviceable. Choose a properly rated driver and provide adequate cooling.
Voltage fluctuation or power surge Voltage outside the specified operating range can overstress the driver and LED components. Sudden failure, intermittent operation, flickering, or visible component damage. Have the circuit checked by a qualified electrician and replace damaged components. Use suitable surge protection and ensure the supply voltage matches the light's rating.
Loose or poor electrical connection A loose terminal, socket contact, or wire creates resistance and intermittent current flow. Flickering, random shutoff, or operation when the fixture is moved. Switch off the circuit, tighten or repair connections, and replace heat-damaged sockets or wires. Use secure terminals and inspect connections during routine maintenance.
Moisture or water intrusion Water can cause corrosion, short circuits, insulation damage, and driver failure. Flickering, corrosion, tripped protection devices, or complete failure. Disconnect power, dry and inspect the installation, replace water-damaged parts, and correct the source of leakage. Use a fixture with an appropriate ingress-protection rating for damp or outdoor locations.
Incompatible dimmer Some LED lights require a compatible dimmer and minimum load. An unsuitable dimmer can produce unstable current. Flickering, buzzing, limited dimming range, or lights that fail to turn on at low settings. Install a dimmer approved for the light and follow its minimum and maximum load requirements. Confirm compatibility before installation and avoid mixing incompatible loads.
Capacitor aging Electrolytic capacitors in the driver gradually lose performance, especially under high temperature. Delayed startup, visible flicker, pulsing brightness, or intermittent shutdown. Replace the driver or complete light assembly; component-level repair should be performed by a qualified technician. Reduce operating temperature and use properly rated equipment.
Excessive switching or thermal cycling Repeated heating and cooling expands and contracts solder joints and electronic materials. Intermittent operation, delayed startup, or failure after repeated on-off cycles. Inspect for damaged joints or replace the light if the circuit board is not repairable. Use a light designed for frequent switching and avoid unnecessary rapid cycling.
Normal LED lumen depreciation LEDs usually become gradually dimmer over time rather than failing suddenly. Lower light output with otherwise normal operation. Replace the light when its output no longer meets the required illumination level. Operate within the rated temperature and electrical conditions.
Mechanical damage or vibration Impact or continuous vibration can damage solder joints, connectors, housings, or LED boards. Cracked housing, loose parts, intermittent lighting, or complete failure. Replace damaged parts and secure the fixture against impact or excessive vibration. Select a fixture designed for the installation environment and mount it securely.

Safety note: Turn off the circuit before inspecting or repairing an LED light. Electrical work on mains-voltage circuits should be performed by a qualified electrician.

How to Diagnose a Faulty LED Light

Diagnosing a faulty LED light starts with observation, not immediate replacement. Turn the power off. Look closely at the bulb, socket, and fixture. Dark patches, melted plastic, loose contacts, or a burnt smell suggest overheating or electrical damage. The U.S. Department of Energy reports that many LED products provide 25,000 to 50,000 hours of useful life. However, that figure assumes suitable temperature and operating conditions.

Try the LED bulb in a working socket, or test the fixture with a known-good bulb. If the problem follows the bulb, the bulb is probably defective. If the socket remains dark, inspect the switch, wiring, and power connection.

Flickering needs closer attention. A mismatched dimmer, loose connection, or failing driver can produce rapid flashes. ENERGY STAR technical guidance identifies compatibility and thermal management as important factors in LED performance.

Heat leaves clues. A fixture installed inside a tightly enclosed housing may feel unusually hot after several minutes. Integrated LED fixtures often fail through their driver rather than the light-emitting components. I have sometimes blamed the bulb too quickly. That assumption can waste money.

Do not touch exposed wiring or test live circuits without proper training. A qualified electrician should check voltage, replace damaged drivers, and assess discolored terminals. If the light flickers, smells burnt, or trips a breaker, stop using it.

Step-by-Step Ways to Fix Common LED Problems

LED lights usually fail because of heat, unstable voltage, poor connections, or incompatible dimmers. The U.S. Department of Energy reports that LEDs use at least 75% less energy and can last up to 25 times longer than incandescent lamps. Still, “long life” is not guaranteed in a hot, enclosed fixture.

Start with safety. Turn off the circuit and let the lamp cool. Check whether the bulb is fully seated, then inspect the socket for dark marks, looseness, or corrosion. Test the lamp in a working socket. If it works there, the original socket or wiring needs attention.

If several lamps fail together, check the circuit breaker and switch. Flickering often points to a dimmer mismatch, loose connection, or failing LED driver. Replace the dimmer with an LED-compatible model. Do not bypass wiring protections.

My own troubleshooting mistake was replacing three bulbs before checking the socket; the socket was the real fault.

Tips:

Keep bulbs below their rated temperature. Enclosed fixtures need specifically approved lamps. Clean dust from vents and heat sinks with power disconnected. For persistent flicker, measure voltage with a qualified electrician rather than guessing. The U.S. DOE Solid-State Lighting reports identify thermal management and driver reliability as major LED performance concerns. A 2023 industry reliability review also links high operating temperature with faster component aging. Record the lamp type, fixture condition, and failure date. That small log can reveal a pattern.

When to Replace an LED Light or Seek Professional Help

LED lights usually fail for practical reasons: heat, unstable power, poor connections, or aging drivers. The U.S. Department of Energy reports that quality LEDs can use up to 75% less energy and last up to 25 times longer than incandescent lamps. However, rated life is not a promise of perfect performance. It often measures when light output falls to 70% of its original level.

Replace the LED when it flickers after testing another socket, shows dark patches, or produces a burning smell. Yellowing plastic, repeated shutdowns, buzzing, and visible moisture also indicate failure. Turn off the circuit before checking a loose bulb or damaged fitting. Do not keep using a fixture that becomes unusually hot. That heat may damage the driver, insulation, or surrounding ceiling.

Seek a licensed electrician when the breaker trips, several lights fail together, or flickering continues with a new lamp. Professional help is also wise for recessed lights, outdoor fittings, bathroom fixtures, and any wiring near moisture. The National Electrical Manufacturers Association emphasizes correct dimmer and control compatibility for LED systems. An incompatible dimmer can create pulsing, noise, or early failure. A useful admission: diagnosis is rarely perfect from appearance alone. Replacing the lamp may hide a loose terminal or overloaded circuit. Record when the problem occurs, check the switch and socket, then stop if exposed wiring appears. Safety matters more than saving one light.

What Causes LED Lights to Fail and How to Fix Them

LED lamps usually last longer than incandescent and compact fluorescent lamps, but heat, power surges, moisture, loose connections, and failed drivers can shorten their service life. The chart compares commonly cited rated lifetimes for household light sources.

Replace an LED light when it is noticeably dim, repeatedly flickers after checking the connection, shows discoloration, or does not turn on. Seek professional help for burning smells, damaged wiring, buzzing from the fixture, water exposure, or suspected voltage and circuit problems.

FAQS

Why do LED lights flicker?

Flickering may come from an incompatible dimmer, loose connection, unstable voltage, or a failing driver. Check another socket first. Do not guess for long.

What should I check when an LED bulb stops working?

Turn off power and let the bulb cool. Check its seating, socket marks, corrosion, and looseness. Test the bulb in a working socket.

What does it mean if the bulb works elsewhere?

The original socket, switch, or wiring may be faulty. I once replaced three bulbs before checking the socket. That was wasted effort.

Can heat shorten an LED’s life?

Yes. High temperatures can age internal parts faster. Keep bulbs below their rated temperature and use approved lamps in enclosed fixtures.

Why do several LED lights fail together?

Check the circuit breaker and switch. Several failures may indicate a circuit problem, loose connection, or unstable power. Stop if wiring looks damaged.

When should I replace an LED light?

Replace it after persistent flickering, dark patches, burning smells, yellowing plastic, buzzing, or repeated shutdowns. Visible moisture is another warning.

Can an LED bulb become dangerously hot?

An unusually hot fixture may damage the driver, insulation, or ceiling. Turn off the circuit and stop using it. Heat matters.

When should I call an electrician?

Seek qualified help if a breaker trips, several lights fail, or flickering continues with a new lamp. Professional advice is wise near moisture.

How can I track repeated LED problems?

Record the lamp type, fixture condition, failure date, and problem timing. A small log may reveal patterns. It is simple, but not perfect.

Conclusion

LED lights are energy-efficient devices that produce light when electrical current passes through a semiconductor. Although they usually last longer than traditional bulbs, several issues can shorten their lifespan. Common examples include excessive heat, unstable voltage, poor-quality components, moisture, loose connections, and incompatible dimmer switches. Understanding what causes led lights to fail makes it easier to identify the problem and choose the right solution.

To diagnose a faulty LED light, first check the power source, switch, wiring, and socket. If the light flickers, dims, or does not turn on, test it in a different fixture when possible. Common fixes include tightening connections, improving ventilation, replacing a damaged driver, or using a compatible dimmer. Always turn off the power before inspecting electrical parts. If the light remains unreliable, shows signs of burning, or is connected to complex wiring, replacement or professional assistance may be the safest choice. A new light is often more practical when repair costs approach the price of a replacement.

Madeline

Madeline

Madeline is a dedicated marketing professional with a wealth of expertise in our company's core offerings. With a keen understanding of the industry, she brings a unique perspective to her role, consistently delivering high-quality content that highlights the superior aspects of our products. As......